
Caring for Your New Sling: A Comprehensive Guide to Jumping Spider Care
This in-depth guide is your go-to resource for raising happy, healthy jumping spider slings—from i2 to juvenile. Packed with expert tips, care routines, and confidence-boosting advice, it’s perfect for first-time keepers and experienced enthusiasts alike.
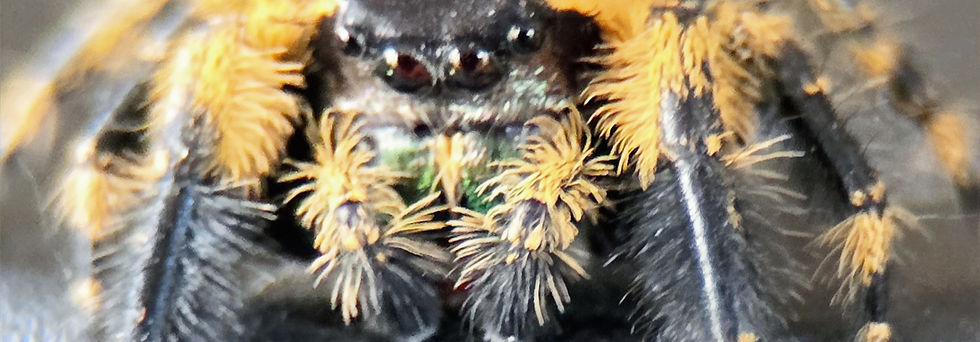
Introduction to Sling Care
1.1 What is a Sling?
A "sling," short for spiderling, refers to a jumping spider in its earliest life stages after hatching. At this phase, slings are typically smaller than a grain of rice and extremely fragile. They are born from an egg sac laid by a gravid female and initially go through a stage called "eggs with legs," where they develop legs but remain clustered together in the sac. Once they emerge, they enter the world as independent hunters.
Because of their minuscule size, slings require specialized care that differs significantly from adult spiders. Their needs include very fine prey like melanogaster fruit flies, stable humidity to prevent dehydration, and secure enclosures to prevent escape. At this stage, even small mistakes like over-misting or over-sized prey can have serious consequences. Understanding what a sling is and how it behaves is the first step toward raising a healthy, thriving spider.
1.2 Understanding Sling Behavior
Slings are naturally curious but also extremely cautious, especially in unfamiliar surroundings. During the first few days after being introduced to a new enclosure, your sling may spend a lot of time hiding or remaining still. This is normal and part of the adjustment process. As they settle in, you'll start to see their natural instincts kick in.
Slings are web architects from a young age. They often choose high corners or the underside of leaves, bark, or lid areas to construct their tiny hammocks. These hammocks are used for resting, molting, and feeling secure. You may notice your sling sitting inside its hammock and only coming out when it senses movement or food.
While small, slings are effective hunters. They rely on vision and vibrations to detect prey and may perform a little "dance" before pouncing. Don't be alarmed if they miss their prey or retreat suddenly—this cautious approach is a defense mechanism due to their vulnerability at this stage.
Each sling will have its own unique rhythm. Some are bold and curious, exploring every inch of their space, while others are shy and prefer the safety of their retreat. Pay attention to their habits and behaviors, as learning what is "normal" for your sling will help you spot changes in mood, health, or molting status later on.
Understanding this early behavior is crucial to meeting your sling's needs and building a foundation for healthy development.
1.3 First Steps After Bringing Your Sling Home
Bringing home a new sling is exciting, but it’s important to approach the transition with patience and care. The moment your sling arrives, it is experiencing a major environmental shift — new sights, smells, temperatures, and vibrations. Giving them time to acclimate is crucial for their well-being.
Before your sling arrives, have its enclosure fully prepared. This includes:
-
A secure, escape-proof lid
-
Proper cross-ventilation
-
A clean substrate (paper towel or a small amount of sphagnum moss)
-
Natural elements like leaves or twigs for hiding and webbing
-
Stable temperature and humidity levels already established
Once your sling arrives:
-
Gently open the shipping container inside the enclosure to allow the sling to crawl out on its own. Avoid poking or forcing it.
-
If the sling is hesitant to move, you can use a soft paintbrush to gently encourage it.
-
Close the lid securely and place the enclosure somewhere calm and away from heavy traffic, loud noises, or direct sunlight.
Do not attempt to feed your sling right away. Give it 24–48 hours to settle in before offering food. The stress of relocation can reduce their interest in hunting, and uneaten prey can stress or even injure a sling.
Avoid handling during this period. Let your sling adjust, explore, and web freely. The more peaceful the environment, the faster it will acclimate and resume normal behavior.
Setting Up the Perfect Enclosure
2.1 Choosing the Right Enclosure Size
The size and type of enclosure you choose for your sling can directly impact its safety, comfort, and ability to thrive. Slings are incredibly small and can be escape artists if not housed properly. An ideal size for most slings is approximately 2” x 2” x 3” (tall orientation is preferred for jumping spiders).
A good sling enclosure should meet the following criteria:
-
Small enough to make prey easy to find, reducing the risk of hunger or stress.
-
Tall enough to allow for web-building and climbing (jumping spiders are arboreal).
-
Secure lid with tight-fitting closure to prevent escapes.
-
Ventilation holes that are micro-sized or covered with mesh to prevent the sling from squeezing through.
Pre-made enclosures for slings are available online, but many keepers also use small deli cups, clear condiment containers, or repurposed jars with modified lids. As long as the enclosure is escape-proof, ventilated, and offers vertical space, it can work well.
Remember, too large of an enclosure can overwhelm a sling and make feeding difficult. It may struggle to find prey or a safe place to molt. Keep it simple and compact until your sling reaches i5 or i6, at which point an upgrade may be appropriate.
2.2 Substrate and Climbing Elements
Choosing the right substrate and climbing structures for your sling’s enclosure is key to creating a functional and comfortable environment. While the sling won’t spend much time on the ground, a good base helps maintain humidity and provides cushioning during falls.
Substrate Options:
-
Paper towel: This is the most common choice for young slings. It’s clean, easy to monitor for mold, and makes spotting food and waste simple.
-
Sphagnum moss: Used in small amounts, it retains humidity well and offers a more natural aesthetic. Be sure it's clean and mold-free.
Avoid deep or overly damp substrates, as excess moisture can lead to mold or bacteria and make the environment unsafe for your sling.
Climbing Elements: Jumping spiders are arboreal, which means they prefer to live off the ground. Your sling will appreciate vertical surfaces to explore and build hammocks. Consider adding:
-
Twigs or small branches
-
Strips of cork bark
-
Artificial or preserved leaves (no pesticides)
-
Tiny platforms or ledges (like bottle caps or small silicone pieces)
Make sure all elements are securely placed so they don’t shift and trap or injure your sling. Materials should be smooth or lightly textured—nothing sharp or rough that could cause harm.
2.3 Ventilation and Safety Features
Proper ventilation is essential to prevent stagnant air, mold growth, and excessive humidity. Sling enclosures should have cross-ventilation: holes on at least two opposite sides of the container to encourage airflow.
Best Practices for Ventilation:
-
Use micro holes or mesh screens to prevent escape (jumping spiders are tiny and very clever!)
-
Holes should be no larger than a pinhead for early instar slings
-
Monitor condensation; constant heavy fogging means poor airflow
Safety Checks:
-
Inspect for sharp plastic edges near air holes or lids that could injure your sling
-
Ensure the lid snaps tightly or screws on to prevent escapes
-
Avoid materials treated with chemicals, glue fumes, or pesticides
Always test your enclosure before use. A sling should never be able to squeeze through the holes or get stuck in a crevice.
2.4 Maintaining Optimal Conditions
Jumping spiders thrive when kept in stable, clean environments that mimic the warmth and humidity of their natural habitats.
Temperature:
-
Ideal range is 75°F to 85°F (24°C to 29°C)
-
Avoid temperature swings or placing enclosures near windows or vents
-
Use a heat mat or heating cable on the side of a rack if needed, not underneath
Humidity:
-
Maintain around 50–60% humidity
-
Light misting every 1–2 days is usually enough; avoid over-saturating the enclosure
-
Watch for mold buildup—if you see it, increase airflow and reduce moisture
Monitoring Tools:
-
A basic hygrometer/thermometer combo can be placed inside or on the outside wall of the enclosure
-
Some keepers prefer digital monitors for better accuracy
Strive for consistency over perfection. Sudden drops or spikes in humidity or temperature are more harmful than being a few degrees off the ideal.
Feeding Your Sling
3.1 What to Feed a Sling
Feeding your sling properly is one of the most important aspects of early care. At this stage, their prey must be small, easy to catch, and safe to consume. The two most common feeder options are:
-
Drosophila melanogaster (small fruit flies): Ideal for i2 to i4 slings. Their tiny size makes them easy for even the smallest spiderlings to hunt.
-
Drosophila hydei (larger fruit flies): Better for i4 and up. These flies are a bit more active and provide more nutrition per catch.
Slings hunt by sight and vibration, so live prey is important. Avoid pre-killed insects unless your sling is known to scavenge. Never offer prey larger than the spider itself—this can stress, injure, or even kill a sling.
3.2 Feeding Frequency
A healthy feeding schedule helps your sling grow at a natural pace. For most slings:
-
Feed every 2–3 days if active and hunting well.
-
Younger slings (i2–i3) may benefit from daily feeding.
-
Larger slings (i5+) may only eat every 3–4 days depending on appetite.
Always observe your sling’s behavior. If it ignores prey, it might be nearing a molt or still adjusting. Remove uneaten food after 24 hours to avoid stress, contamination, or injury.
3.3 Tips for Encouraging Feeding
Sometimes, slings won’t eat right away. This can be due to stress, nearing a molt, or unfamiliar surroundings. Here are tips to encourage feeding:
-
Simulate movement: Gently tap the enclosure or blow lightly to trigger the spider's hunting instincts.
-
Feed at night or early morning: Some slings prefer hunting when it's quiet or dark.
-
Use a feeding ledge: Introducing flies near their retreat or in a small feeding zone can help.
-
Pre-crush flies (for tiny slings): If they’re not attacking live prey, try offering a freshly crushed fruit fly on a surface near their retreat.
Be patient and observe their patterns. A healthy sling may skip a meal, especially before a molt.
Monitoring Growth and Molts
4.1 Recognizing the Signs of Molting
Molting is a natural process where a sling sheds its old exoskeleton to grow. Understanding the signs can help you support them through this delicate phase. Signs your sling is preparing to molt include:
-
Refusing food: This is often the first and most noticeable sign. Slings usually stop eating 1–3 days before molting.
-
Becoming less active: They may retreat and sit motionless in their hammock.
-
Dull or darkening coloration: The exoskeleton can appear faded, gray, or slightly transparent.
-
Increased webbing: They often reinforce their hammock or build a new one for security.
During this time, avoid offering food and do not disturb them. Disturbance or stress can lead to molting complications.
4.2 How to Care for a Sling During a Molt
Caring for your sling during a molt means minimizing stress and providing the right environment:
-
No handling or tapping the enclosure during this time.
-
Maintain consistent humidity – around 60% is ideal. A light mist (not directed at the sling) can help keep conditions favorable.
-
Avoid feeding for at least 24–48 hours before and after the molt to prevent injury.
-
Keep the enclosure clean and avoid sudden changes in temperature or lighting.
The sling will often flip onto its back or side when ready to molt. This can look alarming, but it is completely normal. The entire molt may take anywhere from 15 minutes to an hour. Afterward, the new exoskeleton will be soft, and your sling will need time to harden before moving or hunting.
4.3 Tracking Growth and Development
Keeping track of your sling’s growth is incredibly helpful for anticipating molts and adjusting care routines. A simple log can include:
-
Date and notes for each molt (e.g., visible changes in color or behavior)
-
Feeding history (what was offered and whether it was eaten)
-
Enclosure upgrades and environmental changes
Not only does tracking help you understand your sling’s pattern, but it can also be valuable if you ever need to seek advice from a breeder or vet. You can use a notebook, spreadsheet, or even an app. If you have multiple slings, labeling and tracking each individually is essential.
Handling and Observation
5.1 When and How to Handle Your Sling
Handling slings should be kept to a minimum, especially in early instars. They are fragile, fast, and can be injured or lost easily. Only handle your sling if absolutely necessary (e.g., for enclosure cleaning or rehoming).
Best handling practices:
-
Use a soft paintbrush to gently guide the sling onto a cupped hand or lid.
-
Always handle over a soft surface or near the enclosure in case of jumps.
-
Move slowly and confidently to avoid startling the sling.
-
Avoid handling during pre-molt, immediately after a molt, or when the sling seems stressed.
Even if you enjoy hands-on interaction, remember that jumping spiders bond more through observation than touch.
5.2 Observing Behavior Safely
Watching your sling is not only entertaining but also helps you learn its habits and spot problems early. Spend time near their enclosure daily.
Look for behaviors like:
-
Web-building and hammock construction
-
Hunting or tracking prey
-
Retreating and resting patterns
-
Posture changes (e.g., raising front legs in curiosity or defense)
Tips for safe observation:
-
Use ambient light or soft lamps (avoid bright flashes or direct sunlight)
-
Minimize loud noises or vibrations around their space
-
Keep enclosures at eye level if possible for easier viewing
Your sling will become more active and confident as it adjusts to your presence. Some even begin to watch you back!
Troubleshooting Common Issues
6.1 What to Do if Your Sling Won’t Eat
If your sling refuses food, don’t panic. It's a common concern but often easy to resolve.
Possible reasons your sling isn't eating:
-
Preparing to molt (most common)
-
Recently molted and not yet ready to hunt
-
Prey too large or too fast
-
Stress from rehoming or enclosure changes
What to do:
-
Remove uneaten prey after 24 hours
-
Try smaller or slower-moving prey
-
Avoid feeding for 2–3 days and try again
-
Check humidity and temperature levels
Give your sling time. If it resumes normal behavior and webs actively, it's likely just being picky or pre-molt.
6.2 Recognizing Signs of Stress or Illness
Healthy slings are active, responsive, and frequently seen webbing or hunting. When something is off, early intervention can make a big difference.
Common signs of stress:
-
Pacing along enclosure walls repeatedly
-
Refusing to build a hammock or retreat
-
Lethargy (staying in the same place for days)
-
Curling legs under the body
Possible health issues:
-
Dehydration (shriveling or dry appearance)
-
Mold or contamination exposure
-
Physical injury (falling, stuck during molt)
When in doubt, reach out to a trusted breeder or community. Photos and behavior descriptions help others assist you more effectively.
6.3 Addressing Issues with the Enclosure
A poorly set up enclosure can quickly lead to stress, escape attempts, or illness.
Check for:
-
Poor ventilation: fogging or stagnant air are signs airflow needs improvement
-
Escape points: look closely at lid seals, ventilation holes, and gaps
-
Contamination: remove old prey, moldy spots, or dirty substrate
-
Hazards: sharp edges, falling objects, or heavy decorations
Regular visual checks and light spot cleaning can keep the sling’s space safe and comfortable. Remember, a clean, secure environment is key to raising a healthy spider.
Transitioning to a Juvenile Spider
7.1 Signs Your Sling is Ready for a Larger Enclosure
After your sling reaches about i5 or i6, you may notice signs that it’s ready for more space:
-
Webbing along every surface or lid
-
Difficulty catching prey due to tight quarters
-
Physical size nearing half the width of the enclosure
-
Attempting to climb or escape repeatedly
Upgrading at the right time helps reduce stress and encourages continued healthy growth.
7.2 Upgrading Enclosures Safely
Always set up the new enclosure before attempting a transfer. Make sure it's clean, stable, and has:
-
Proper ventilation
-
Webbing surfaces
-
Familiar elements like the same type of leaf or perch
To transfer:
-
Coax your sling into a small container or cup using a soft paintbrush.
-
Gently introduce it to the new setup.
-
Allow time for exploring without offering food for the first 24 hours.
Avoid shaking, tapping, or rushing the process. Calm movements help reduce stress and the risk of injury.
7.3 Adjusting Care as Your Spider Grows
As your sling develops into a juvenile, its needs will shift:
-
Feeding: You can increase prey size and slightly reduce feeding frequency
-
Space: Larger spiders will want more vertical room and hiding spots
-
Humidity: Keep monitoring but be cautious of over-misting as they become more resilient
Continue tracking molts and behavior. Some juveniles become bold and active, while others stay shy. Observing and adjusting helps your spider thrive through its next stages.
About the Founder of AK Spood and Company
My name is Victoria Leavens, and I am the proud founder of AK Spood and Company. My journey with jumping spiders began as a small curiosity that quickly blossomed into a deep passion. These fascinating creatures, with their playful personalities and curious behaviors, have become a cornerstone of my life. Over the years, I’ve dedicated myself to learning everything I can about their care, behavior, and needs.
Beyond jumping spiders, my love for exotic animals extends to many unique species, fueling my appreciation for the natural world. AK Spood and Company is my way of sharing this love with others, offering resources, products, and guidance to help fellow enthusiasts provide the best care for their arachnid companions.
When I’m not tending to my spiders, you’ll find me exploring wildlife photography or spending time in nature, continually inspired by the beauty and diversity of our planet. Thank you for supporting AK Spood and Company—I’m thrilled to share this journey with you!